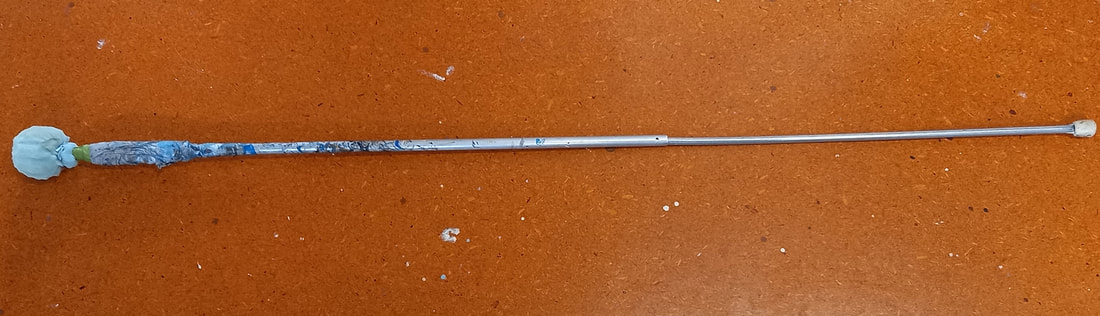
 tArtists have been using a mahl stick for centuries. The main purpose is to support your painting hand away from the surface of the painting while the mahl stick is being held by the other hand. They can be bought from art shops and sign writers supplies but you can easily make one. I made my one many years ago as can be seen from the paint. It is made out of aluminum tubing about 15mm in diameter. I have a narrower piece that is inserted into the main shaft. I found that without this it was a little shorter than i needed. This inner aluminum shaft is from an old UHF television aerial. Ii can slide in and out depending on the length i need at the time. The overall length as shown in the photograph is about 1300mm. Aluminum tubing can be bought from hardware outlets. They can just as easily be made from dowel. I would recommend 10 to 15mm in diameter. Too thin and they bend too much . Too thick and it becomes a bit cumbersome. I used aluminum tubing as it is light with little flex. On the far right end i have pushed on a rubber stopper that I got from a hardware store. This protects the painting surface if you accidentally scrape the end across the painting surface. Being rubber it also allows me to lean it against the painting close at hand without too much risk of it sliding off and falling on the studio floor, just when you need it. The bulb end on the left, which rests on the painting, is traditionally made from leather folded over the end and tied. Usually with some packing underneath to form a bulb shape. The bulb needs to be soft enough so that it does not damage the paint surface but you don't want it to slip. I have tried a few variations to make this bulb with materials to minimise the risk of slipping. Really frustrating if it slips when you are in the middle of painting a straight line. Leather is good but the best I have found is foam mattress rubber. I got a chunk of it and cut it into a rough sphere before cutting a small hole about halfway through and inserting the end of the aluminum into it, Then i tied it very tightly around the shaft. With scissors i then pinched out vertical concave pieces. I found this gives it more stick to the surface of the painting. 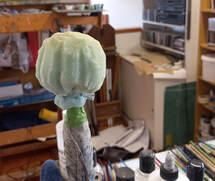 The bulb on my mahl stick has just been replaced. It is cut from a bit of mattress foam as described above.. Below the bulb i have taped a rag which i wound around the shaft and secured with masking tape. I like to dab off excess paint onto it as I work. I use the mahl stick for a few different reasons. -- for supporting my painting hand when painting very small areas with small brush. This gives more control as you are at a much better angle and distance from the surface. -- When working on an area that is wet or close to wet areas where you need some control. --For painting straight lines and smooth curves. This is the one that needs lots of practice and is the primary reason that sign writers use them. I will go into more detail on how I use the mahl stick to achieve straight lines and clean curves. To achieve the best result you need to rethink your painting hand technique a little when using a mahl stick. I am left handed so will explain my technique that way. It is best to have the easel height setup so that you are working at about eye level. that way you can see the brush delivering the paint and yet have good control. Too low and it is very awkward to get smooth movements. Too high and you can't see the paint coming off the brush when you need to. Positions the bulb end as far away from the area that you are working on without the risk of it slipping over the edge. I always work standing up and for painting straight lines or smooth curves this will give you more body control. To get the best result you need to be able to create an arc movement from where the bulb is resting. For painting straight lines I find that it is easier to keep the flow of the line smooth and even when my painting hand is further away from the bulb anchor point. Hold the brush as you would normally but rest the palm of your hand on the shaft of the mahl stick. Then smoothly move the other hand, that is holding the other end, down in an arc with the brush delivering the paint onto the painting surface. The trick is to let the mahl stick guide the brush as you move it rather than painting strokes as you would normally paint. 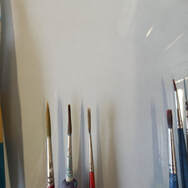 Paintings with man made objects like building, furniture etc will have straight lines. The best brush to paint these is a rigger brush. These are very long bristled , essentially round brush. The long bristles give a lot more control than shorter bristled brushes. more to come......................
1 Comment
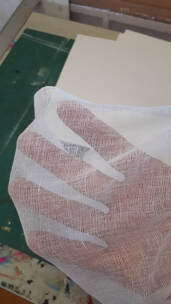 The Photo on the left is "baby muslin" It comes in a width of about 900mm and costs about $4.00 a Metre so it is very inexpensive and can be bought from most fabric stores.. The idea of this project is to make boards that are light and cost very little to make apart from a bit of time. Smilar to canvas but often with a varied texture. Painters are often intimidated by the cost of the material they are painting on and feel that they must produce a successful painting every time. As an art teacher I always insisted that my students buy an inexpensive newsprint scrap book. That way they would dive right into working drawings without the worrying about "wasting" a piece of cartridge paper. These boards are for the same reason. You can dive right in with plein air painting or make quick painting sketches without worrying about the cost . Besides this they give a great texture to paint on for either oil or acrylic. 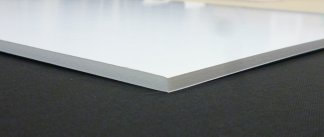 Foam board or MDF, ply or hardboard. Here I use foam board as i have off cuts which are too small for most framing work so would be discarded. They are constructed of a high density foam inner with a light card fixed on both sides. This makes a very smooth surface and it can easily be cut with a sharp craft knife and the finished muslin board is very light If you prefer something with a bit more weight you could apply the same method using 6mm MDF, ply or hardboard rather than the foam board. It is important if using this method for MDF, ply or hardbaord that the back of the board is painted. This prevents the board from warping. I use a standard white undercoat and roll it on. 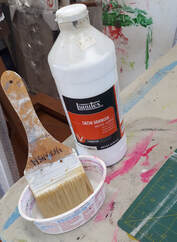 Gluing down muslin Cut the muslin so that it is at least 20mm bigger all round. There are a number of ways to adhere the muslin to the board. I use acrylic satin or matt varnish. PVA can also be used but it it not regarded as being archival and may yellow with age. EVA glue is widely used in the bookbinding industry and is archival. Roll ( use a foam roller) or brush a coat of the varnish on the side that you are adhering the muslin to. This will seal the board. Brush is good for small boards but a roller is much quicker for larger boards or when you want to do a batch. Often the acrylic varnish is very thick. I thin it with about 20% water and store this in a separate container. Don't make it watery as it will go into the foam board and make it warp or delaminate. Once this is dry, roll or brush another coat onto the board. While this is wet, carefully lay the the muslin onto the board. It is easier to work from the short side and lay it progressively onto the board being careful to keep it wrinkle free. This is where ironing the muslin pays off. However, the next stage will usually get rid of small wrinkles. 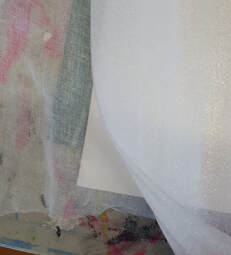 lay a piece of baking paper over the top of the glued down muslin. Then use your hand to smooth it out . Start in the middle and work out to the edges. Use firm pressure to really get the acrylic varnish or glue to into the weave of the muslin. Concentrate on the edges to make sure it is adhered on all edges out to the corners. I usually then roll or brush another coat of varnish on top of the muslin. Again, use the baking paper to work it in and ensure there are no wrinkles. Instead of your hand you could use a rubber roller, Allow to dry for at least 24 hours. In the photo I used a piece of thin foam to rub down the muslin onto the board. Baking paper is better but i had this off cut piece in my studio 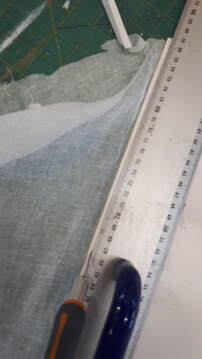 Finishing Before trimming back make sure the muslin is firmly glued right out to the edges. If not work a bit of glue into the areas that are not adhered. If using foamboard turn the board over so that the muslin side is down then with a very sharp craft knife and steel ruler, trim a little off each edge to get a clean finish. With MDF, ply or hardboard. trim the muslin by running the blade along the edge. Roll or brush on 3 coats of Acrylic Gesso allowing time for each coat to dry. If you want to fill a little more of the texture more coats can be applied. Once really dry it is ready for painting using either oils or acrylic. 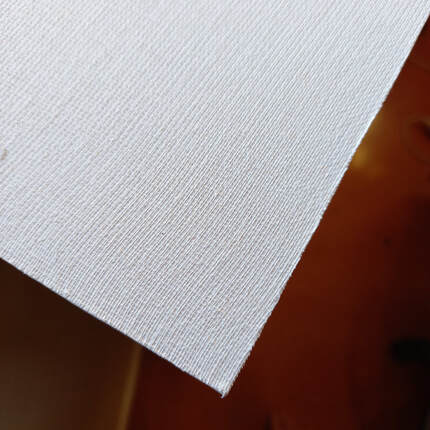 Close up of finished panel. looks a very similar texture to canvas here but overall you will see variations in the texture of muslin over the board making for an interesting surface to paint on.
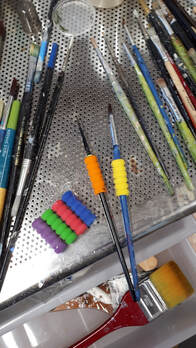 Recently I have been getting finger cramps after longer painting sessions when using smaller brushes. I phoned art supply shops and googled for possible solutions. My thinking was that if i increased the diameter of the brush it would help. I found these foam sleeves in a stationery shop. I think they are for going over pencils to make it easier for little fingers to grip. They cost very little and solved the problem. In fact, they make the brushes very comfortable to use. |
AuthorI have been a painter for a long time and would love to share my process and techniques i have learnt during this time ArchivesCategories |
 RSS Feed